Outlook 2013 seeks to resolve this problem by limiting the number of results that it shows when you execute a search. But if you find that the initial results often don’t include the email that you need, then you might be interested in removing this limitation so that all of the relevant results are shown when you run a search.
How to Always Show All Search Results in Outlook 2013
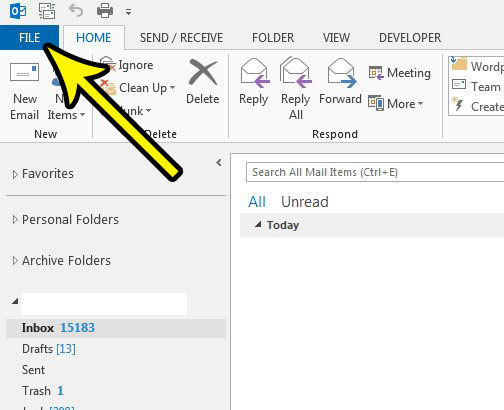
The steps in this article were performed in the desktop version of Outlook 2013 in Windows 7. By completing the steps in this guide you will be changing a setting in Outlook that limits the number of search results that are first displayed when you run a search. This is meant to improve the efficiency of the search engine. Note that after changing this setting it may take longer for your searches to complete depending on the speed of your computer and the size of your email inbox. Step 1: Open Outlook 2013. Step 2: Click the File tab at the top-left corner of the window.
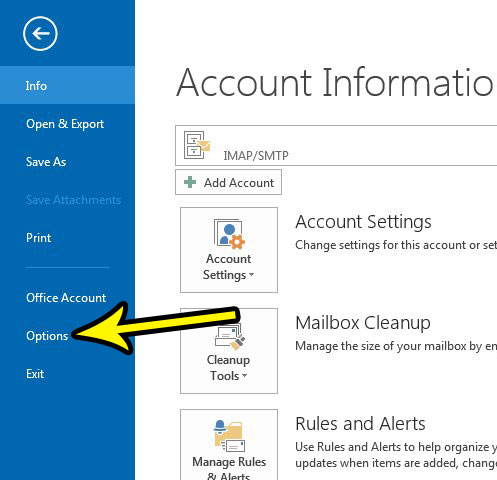
Step 3: Select Options from the column on the left.
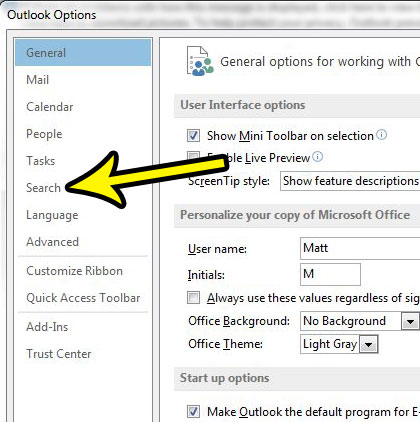
Step 4: Choose the Search option in the left column of the Outlook Options window.
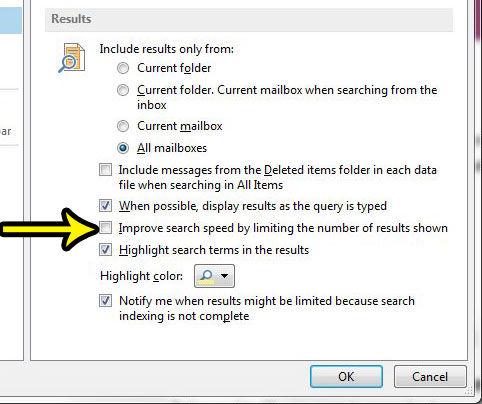
Step 5: Click the box to the left of Improve search speed by limiting the number of results show to remove the check mark, then click the OK button at the bottom of the window to save your changes.
Does it seem like Outlook is running a little slow? Find out how to disable animations and see if that helps to improve the performance of the application on your computer. He specializes in writing content about iPhones, Android devices, Microsoft Office, and many other popular applications and devices. Read his full bio here.